By default, once Inventor is installed, you will have eleven Libraries available to you as shown below:
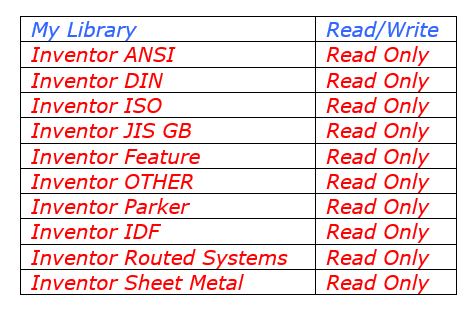
In order to edit the properties e.g. Part number or Description of any component within the Content Centre, it first has to be copied into a Read/Write Library from the Default Read Only InventorStandardContent Library.
Whilst it is possible to create your own Read/Write library with any name you require, for the purpose of this document we will use the Default Read/Write Library – My Library.
To verify the Libraries explained above
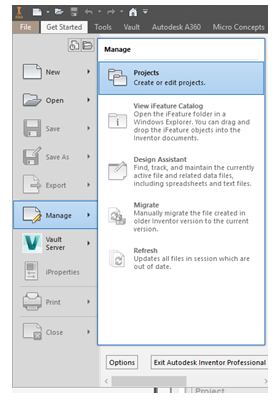
Start-up Inventor, then go to File on the top menu bar and go to manage and select Projects.
Select the ‘Configure Content Center Libraries’ button from the projects window.
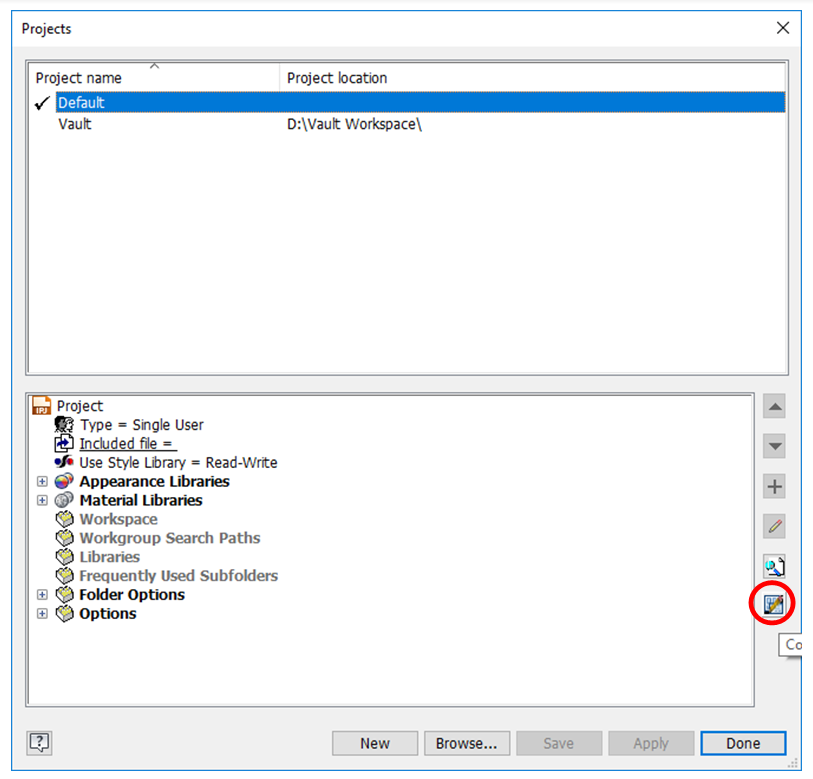
This will show the Libraries currently in use for this Project file (.ipj)
N.B. Libraries can be controlled on a per Project basis i.e. utilising different libraries for different projects.
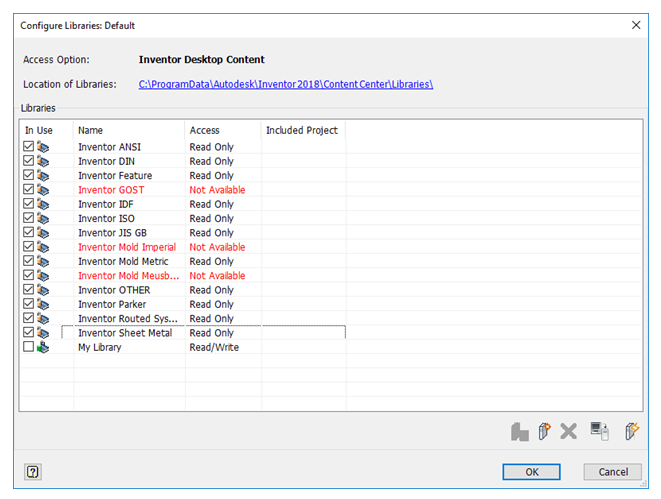
Notice that some libraries are unavailable, these libraries can be added as an extra when installing.
Select OK to close the Configure Libraries Dialogue Box.
Copying Content to a Read/Write Library
In this example we are going to copy a Socket Head Cap Screw (ISO 4762) into our Default Read/Write Library (My Library) and edit its properties to our company standards.
Firstly, go to Tools on the top menu bar and select Content Center Editor.

To make finding the part in the content centre easier we will first ‘Filter’ out some of the standards installed within the Content Centre.
From the Content Center Editor... Dialogue Box; select the ‘Filter Expand Button’

This will show all the standards that are currently loaded.

Select the ISO standard from the Category Listing, navigate to Fasteners > Bolts > Socket Head.
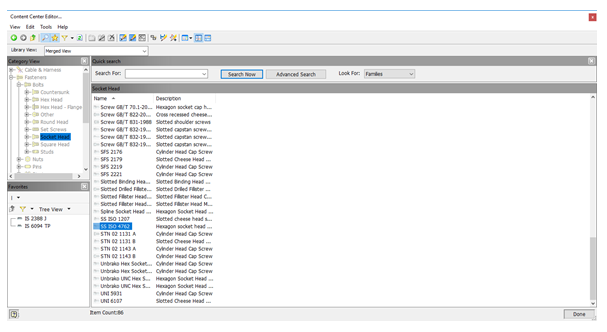
N.B. As you can see there are a lot of parts an easier navigation may be to search for the part in the ‘search for’ tool bar.
Right Mouse Button on the Socket Head Screw – ISO 4762 and Select ‘Copy to > My Library.’
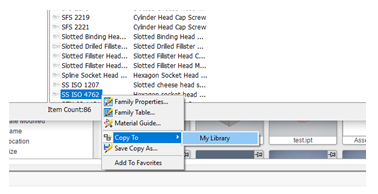
This will take a few moments to copy the correct section of the content centre from the Default Read Only StandardContent to the Read/Write – My Library.
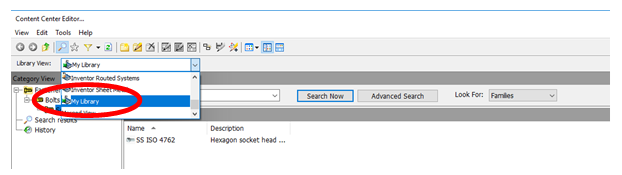
Once the copy has completed successfully, select My Library from the library view pull down menu:
The copy of the ISO 4762 bolt we just created will appear in the library, if you right click on the new copy of ISO 4762 and select Family Table...
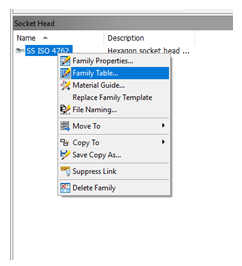
We are now ready to edit the properties of this Family.
Editing Content Centre Properties
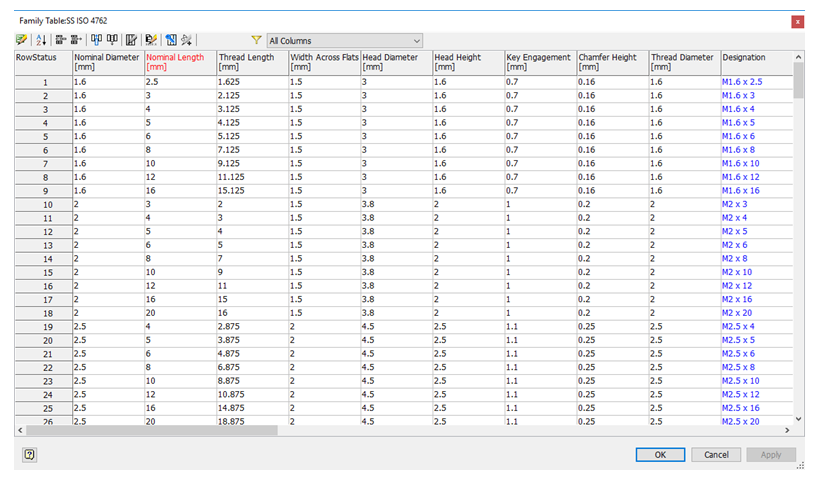
In the table view below you can now click into any of the fields and edit the information associated with that size of component for example:
Scroll down and find the M10 x 20mm Long entry (Line 85 in the table)

Scroll across to the right until the Part Number Column is visible.

Notice that the text in this column is blue. This is because the information in this column is being populated by an expression. In this case the expression concatenates both plain text (ISO 4762 – M) and the values of two other columns – Nominal Diameter (NND) and Nominal Length (NLG) – hence the full part number of ‘ISO 4762 M10 x 20’.
We will examine expressions further in part 2.
For now, manually edit the value of this field to give it our company standard Part/Stock number of SCRWM10X20 then press Enter.

Notice as soon as Enter is pressed, the field is highlighted in yellow denoting that it is out of date. The yellow ‘update’ lightning flash is now showing against this row.
Also notice that the ‘Apply’ button has now become enabled in the lower right corner of this dialogue box.
Once changes have been made to components in the Content Center Editor, those changes need to be published back to the database that resides behind this Content Center.
Remember, once again, that you are publishing back to a COPY of the ISO 4762 and not the original Read Only library. Due to this fact, it is always possible to restore the default ISO 4762 family that originally shipped with Inventor.
Press the ‘Apply’ button.
After a few moments, Inventor will report that the update has been published successful:

Check the Part number field for the M10 x 20 long Screw. It should now read SCRWM10x20.

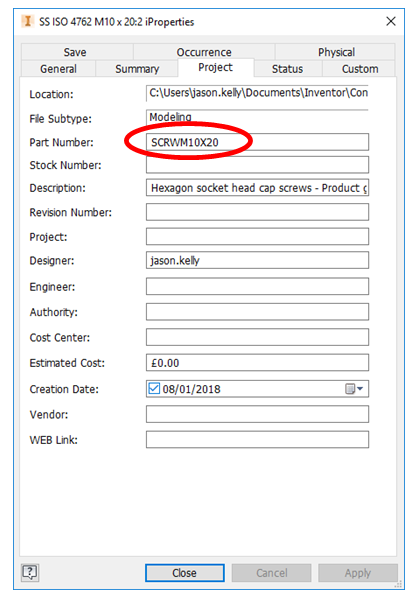
Use the Insert button to insert an instance of this screw into your assembly.
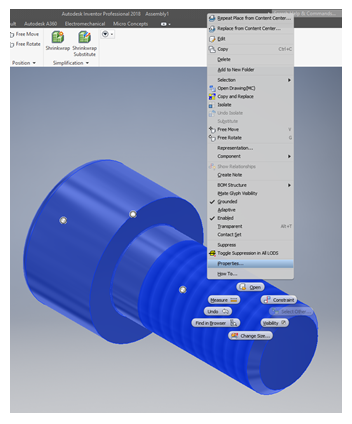
Right Mouse Button on the Part and select Properties to verify that the Part number is now SCRWM10X20.
The above method can be used to change and publish any of the information that exists in the table view of this family
In Part 2, we will look at creating new columns, creating expressions, and mapping the columns to Inventor Properties for use in Part lists.
If you would like to brush up on your Inventor skills and make the most of its tools, explore our Inventor Essentials course.
If you would like more information on Inventor or this Technical Document, please contact us on 0345 370 1500 or email info@symetri.co.uk.

Author
Graham Harrison
After many years in the manufacturing industry designing and managing control system projects for clients, Graham has transferred his knowledge and experience to helping other businesses apply the same principles and processes to achieve improvement. Having studied both IT and Engineering Graham is ideally placed to understand customer objectives and goals and how to apply and adapt commercial IT solutions to achieve those.


